Fencing Buddy: Protoboard
This was one of the most complex PCB designs I’ve ever worked on, however it wasn’t too difficult using my knowledge from past projects to work on this. The main challenges came later on when we started trying to send out our PCB for assembly; we ran into some issues where we couldn’t get certain parts we wanted.
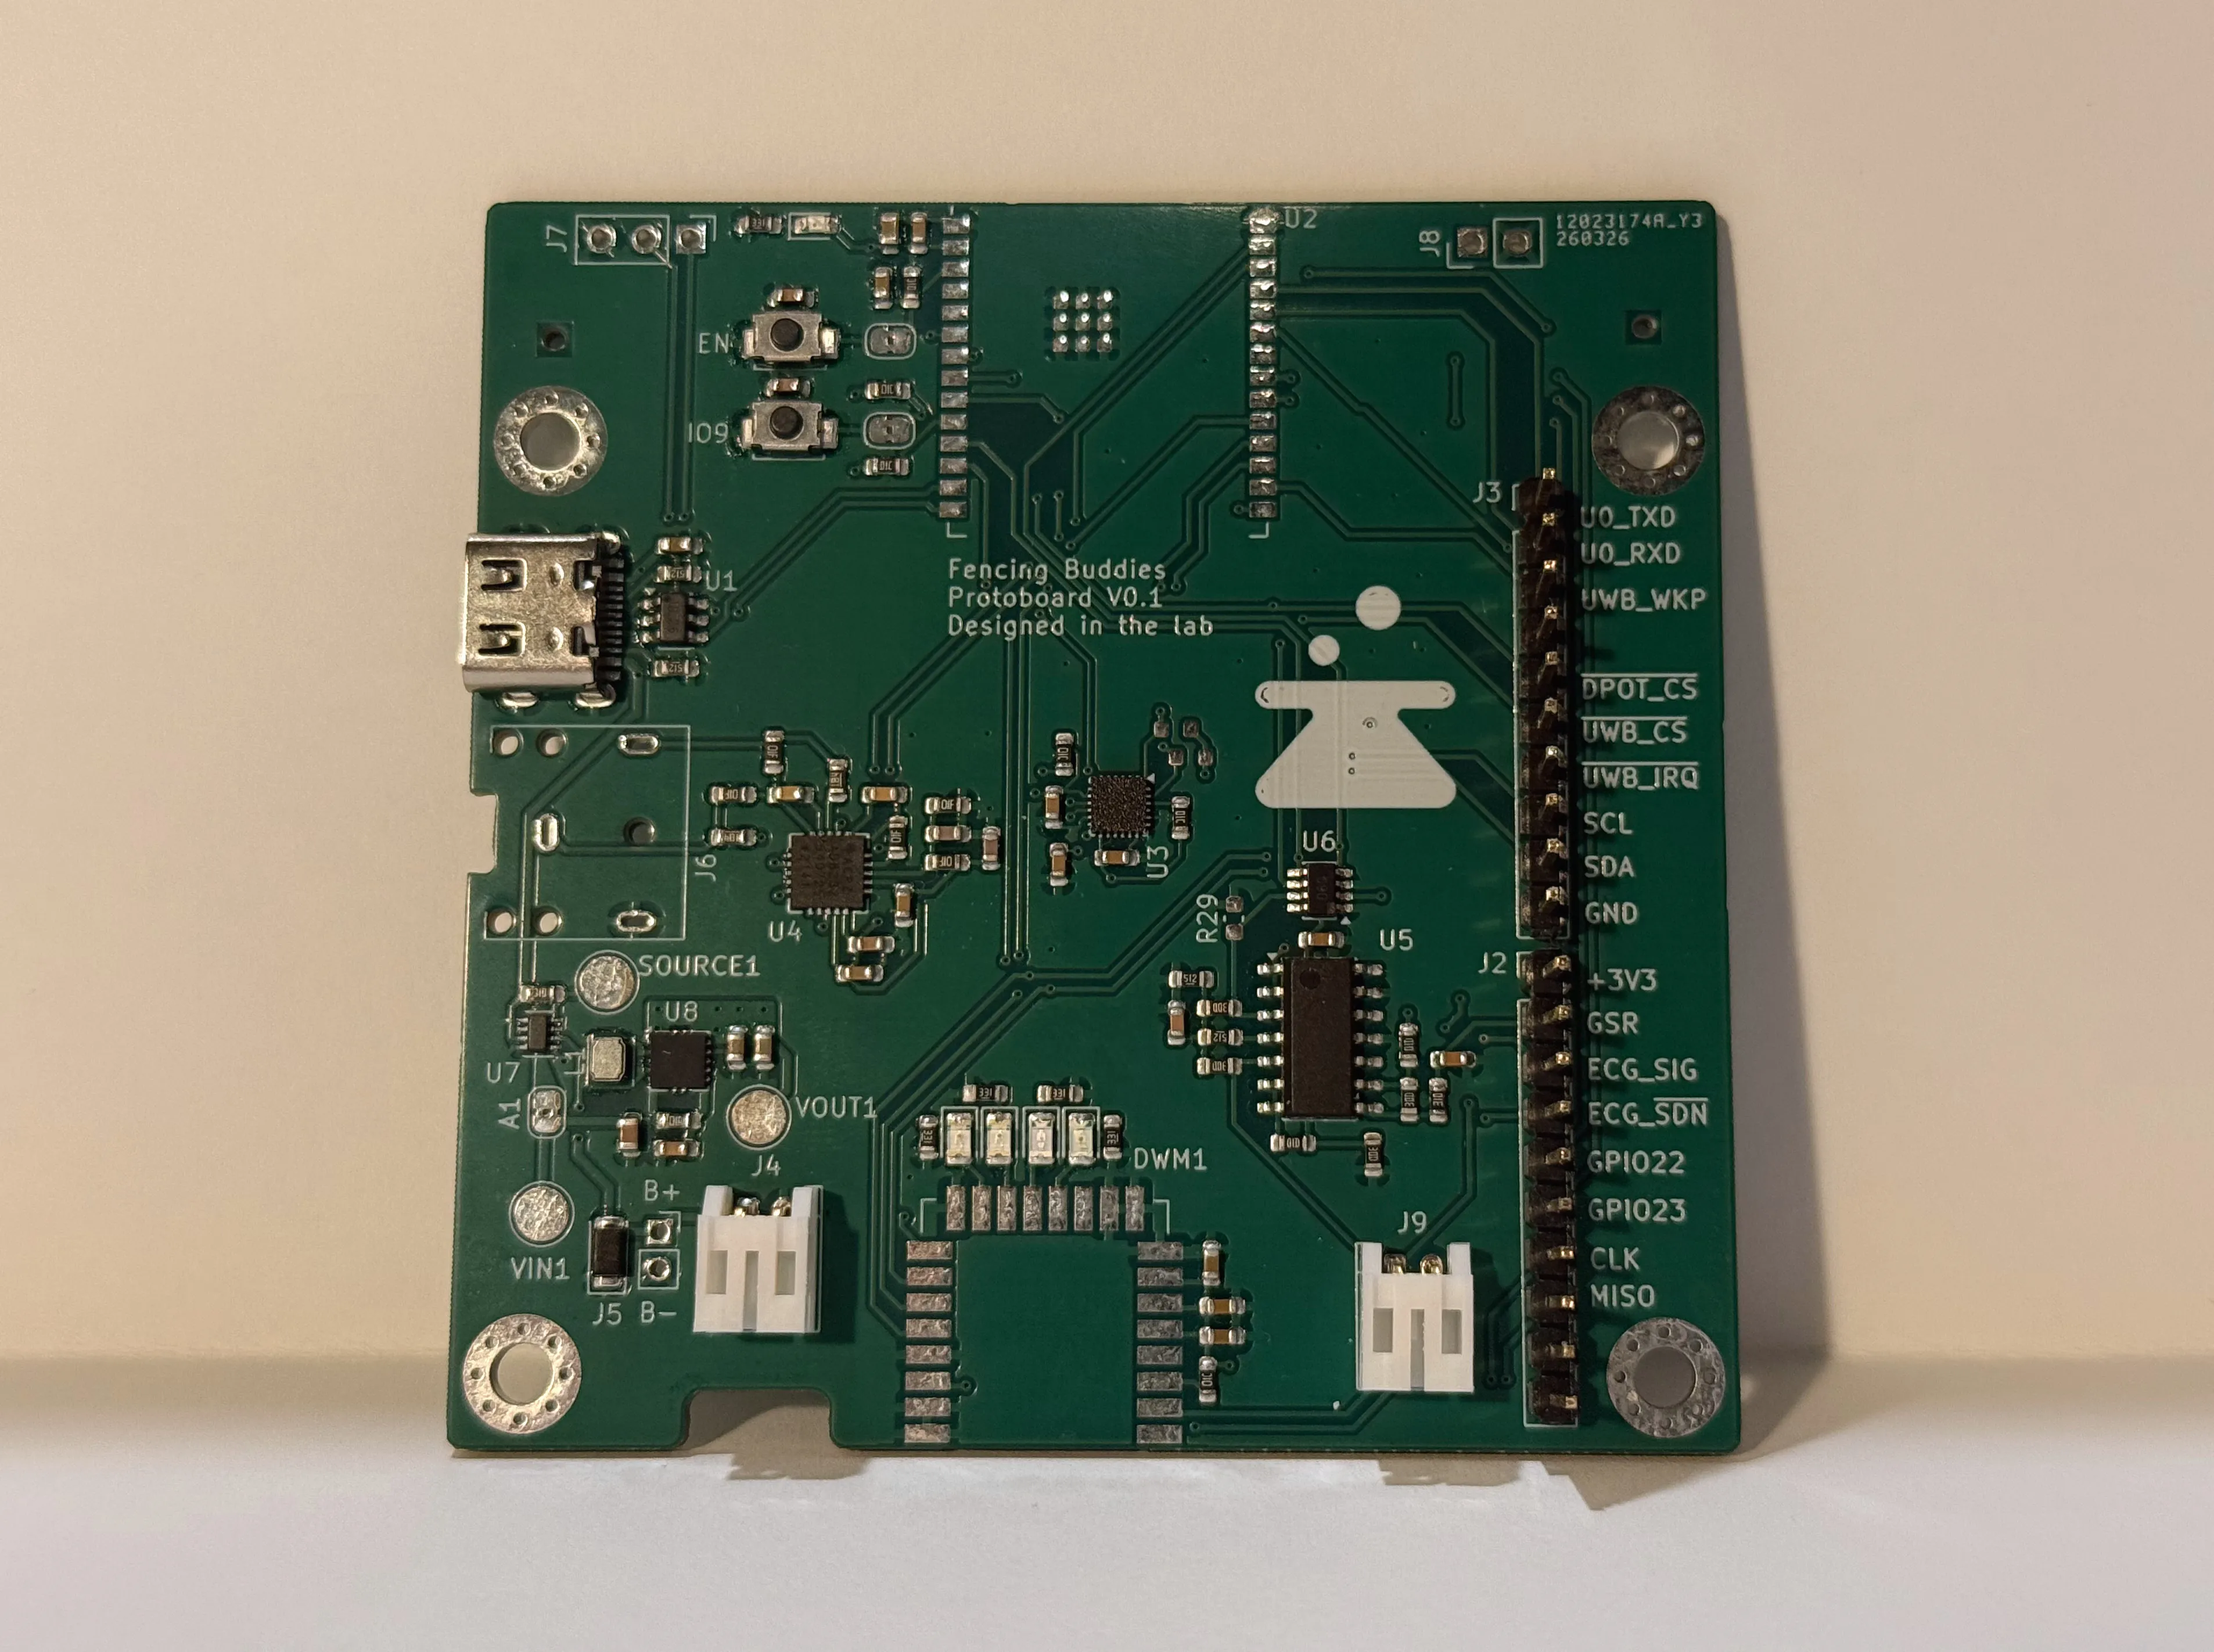
However, I’m really proud of the final product we ended up with. You may notice that in the picture of the board it is missing a few components. The unfortunate part about this project, is that we weren’t able to get some of the parts in time before the end of the semester. Despite that, all of the power circuits on the board worked, and we were able to use each of the sensors we had placed on the board. It’s definitely something I’d want to come back to in order to actually test out the design we came up with.
Initial Design
The initial design of the protoboard was based around the following set of sensors:
- DWM3000: An ultrawideband positioning sensor.
- LSM9DS1: A 9 degree of freedom IMU.
- AD8232: An ECG IC.
- LM324D: An opamp circuit designed to measure galvanic sweat response.
When working on the project prior to designing this prototyping board, we generally used whatever microcontrollers each team member had available. Thus, when it came time to make the board that would integrate all of them, I was tasked with deciding on a microcontroller. I decided to go with the ESP32-C6. This was because I had some experience with the microcontroller prior to this project, but also becasue it met the main specifications we needed:
- Low Power: So it can run for a long time on a battery
- Wifi/Bluetooth: Original plan involved using bluetooth for data transfer
- Ease of Use: The ESP32 system is well documented and the development environment, esp-idf would make it very easy to integrate the sensor suite.
Once the parts were picked out, making the actual schematic was pretty simple. We did some design review at our team meetings and made sure that everyone had the components necessary. I ended up doing the schematic work for the microcontroller and the interconnects with everyone elses work as well as the IMU, GSR, and UWB schematics. My teamate Akshaya did the the ECG schematic and Jason did the power circuitry.
Past the schematic work, I was put in charge of doing the layout, which took about a days or two of work, but wasn’t too bad in the grand scheme of things. It was definitely nice getting to work on a project like this after I’d had a bit more layout experience, since in past projects I would often have to start over after realizing that I had made routing extremely difficult for myself. This time, I did one pass of layout, and the routing ended up being pretty simple.
Assembly Set Backs
The main issues in this project came when we first tried to get it assembled. We had chosed to go through JLCPCB, and while they had many of the simpler components we needed, some of the more advanced IC’s had gone out of stock since we added them to our project. Of note was the ECG and the IMU.
Fixing the problem of the ECG luckily ended up being quite simple, there was someone with extra stock that we were able to purchase, however the IMU was a bigger challenge. It was completely out of stock and there was a very high likelihood that it wouldn’t be restocked for months. There were two main ways through this, we could purchase the IMU through Mouser/Digikey and have it shipped to JLC, or we could spec another IMU. Since the Mouser/Digikey option ended up costing a lot of time and money, I decided to swap out the IMU for one that was more redily available from JLC. Thus we ended up using the ICM-20948 in the final product. This IMU was also 9 degrees of freedom, had and I2C interface, and additionally came in a similar formfactor to the IMU that we were already using.
Once the boards were actually ordered, there was only one slight issue with one of the components chosen, but other than that everything went smootly.
The Final Product
In the end our final board ended up turning out really well! All of the circuitry worked, and the cool power supply selecting circuit that I included did it’s job wonderfully. The only setback was that the microcontroller and ultrawideband chip, which we had decided to hand assembly to save costs, never arrived in time for our final showcase. Nonetheless, thanks to the helpfull breakout pins I included, our team was able to try out some of the peripherals included on the board.